/* */
Acoustic Treatment Tips: Enhancing Audio Clarity in Large Performance Spaces

Acoustic Treatment Tips: Enhancing Audio Clarity in Large Performance Spaces

Advanced Acoustic Engineering: Optimizing Sound in Large-Scale Performance Venues

In high-capacity performance environments such as stadiums, black box theaters, and auditoriums, precision-engineered acoustics are critical to delivering intelligible speech and accurate musical reproduction. Excessive reverberation, phase interference, and uncontrolled reflections can severely degrade audio quality, impacting both performers and audiences. A comprehensive approach to acoustic treatment—balancing absorption, diffusion, bass management, and system optimization—is essential for achieving uniform, high-fidelity sound coverage.

1. Reverberation Control Through Strategic Absorption

Effective absorption reduces excessive reflections while preserving natural room acoustics. High-performance materials should be applied with consideration to frequency response, spatial distribution, and decay characteristics. Key implementations include:

  • Multi-density acoustic panels with calibrated NRC (Noise Reduction Coefficient) values to provide targeted absorption across mid-to-high frequencies.

  • Full-height stage drapery and acoustic curtains with variable weave density to control reflections while maintaining aesthetic integration.

  • Engineered acoustic flooring solutions, including high-density rubber underlays and specialized carpeting, to minimize ground-borne reflections and impact noise transmission.

2. Precision Diffusion for Even Sound Distribution

While absorption mitigates excess reverberation, diffusion ensures sound energy is evenly distributed, avoiding dead spots or excessive damping. Optimal configurations involve:

  • Quadratic and fractal diffusers for broadband scattering of mid- and high-frequency sound waves, preventing localization of reflections.

  • Ceiling-mounted reflectors with asymmetrical geometry to disperse sound energy efficiently while maintaining directivity control.

  • Wall-mounted phase-grating panels positioned to minimize specular reflections and improve envelopment in listening zones.

3. Overhead Acoustic Management: Baffles and Clouds

In venues with high ceilings, managing vertical reflections is critical. Overhead treatments should be implemented with consideration for venue scale and architectural constraints:

  • Variable-depth ceiling clouds, optimized for different frequency bands, to control flutter echoes while preserving natural ambiance.

  • Hanging baffle arrays, placed in mathematically determined configurations, to address long-delay reflections and standing waves.

  • Hybrid absorptive-reflective ceiling systems that maintain energy in the space without excessive high-frequency attenuation.

4. Low-Frequency Control: Targeted Bass Absorption

Large venues often suffer from uncontrolled low-frequency energy, leading to modal buildup and resonance issues. Effective bass management solutions include:

  • Broadband bass traps utilizing porous absorption with extended low-end efficiency to address wide-spectrum low-frequency reflections.

  • Membrane and Helmholtz resonators, strategically tuned to mitigate dominant room modes and standing waves.

  • Corner-loaded and pressure-zone absorbers designed for maximum efficiency in mitigating subharmonic accumulation.

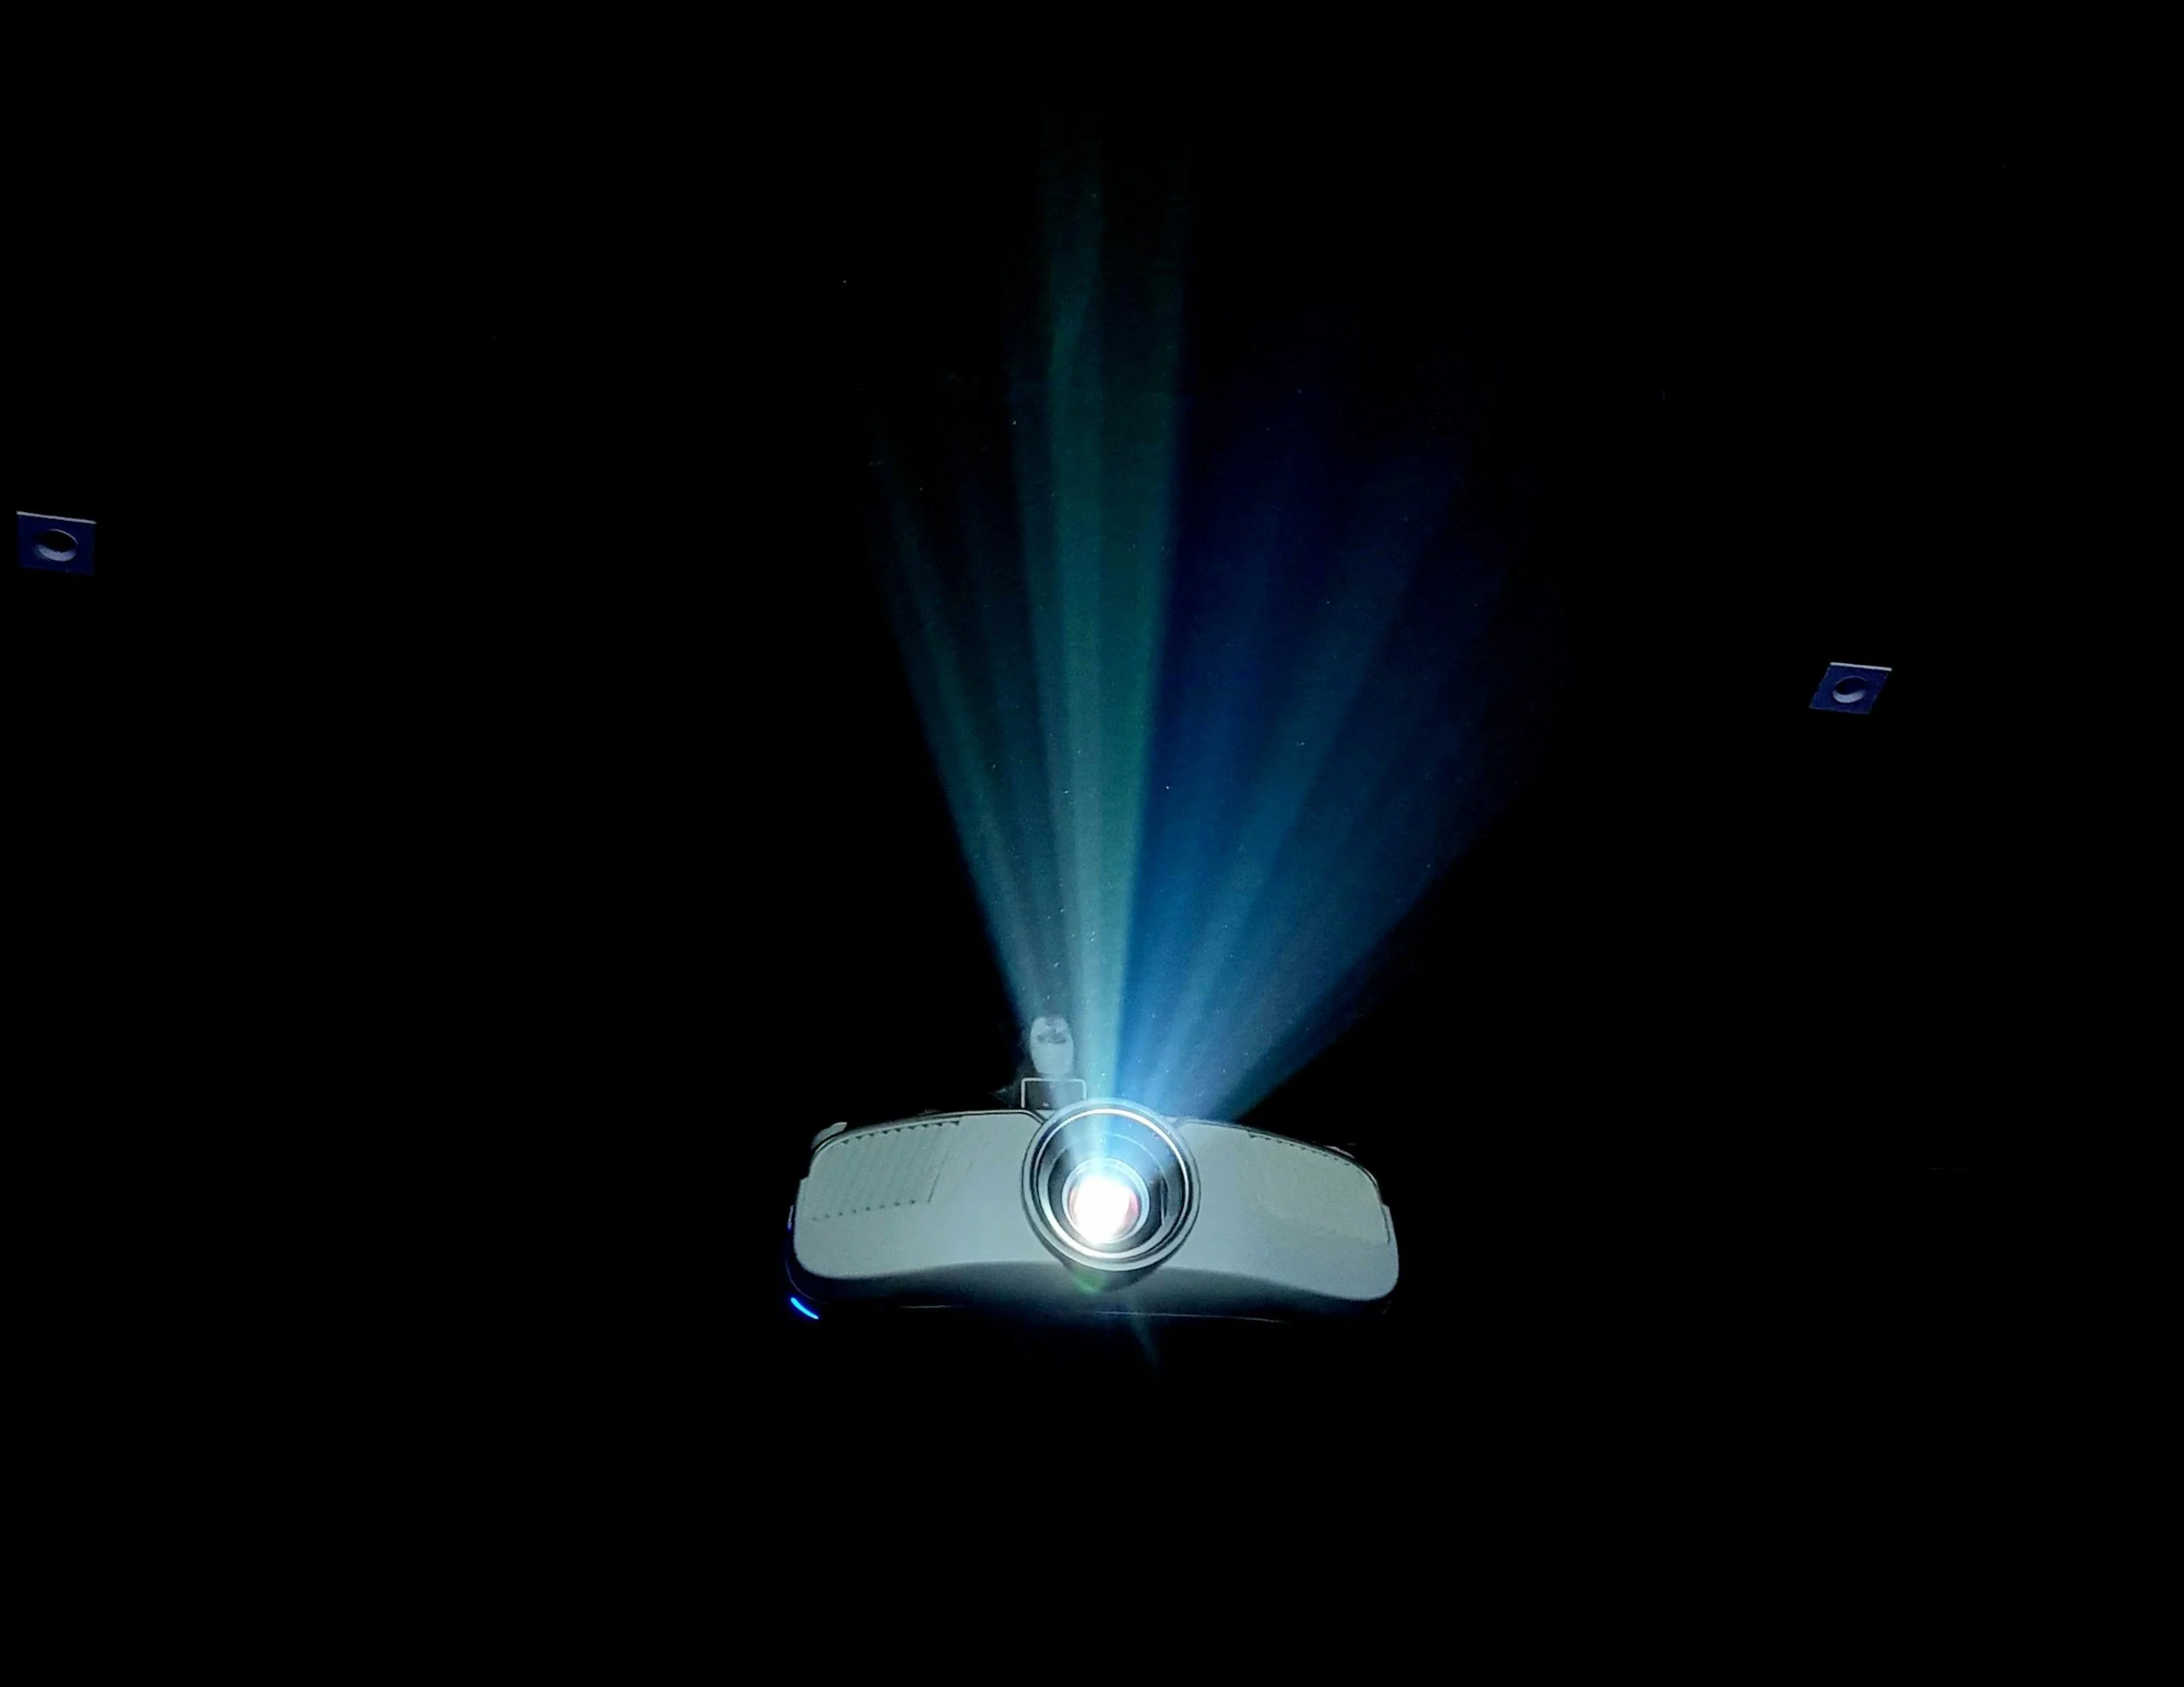
5. Precision Speaker System Design & Deployment

Acoustic treatment and speaker placement must be designed in tandem to ensure optimized directivity, phase coherence, and SPL (Sound Pressure Level) consistency:

  • Time-aligned line array systems with optimized vertical dispersion to provide even coverage while minimizing destructive interference.

  • Point-source configurations for intimate venues, ensuring controlled propagation and reducing off-axis coloration.

  • Active beam-steering technology to dynamically adjust directivity patterns in real time, optimizing audience coverage while mitigating reflections.

6. Acoustic Enclosures and Sound Containment Strategies

To maintain clarity and prevent sound spillover into unintended areas, precision-engineered containment measures should be employed:

  • Architectural acoustic shells with calculated curvature and diffusion properties to enhance projection while preserving clarity.

  • Absorptive and reflective hybrid partitions, custom-built to balance sound isolation and controlled reflection within multi-use performance spaces.

  • Decoupled wall and ceiling assemblies featuring resilient channel systems and damping compounds to minimize structural vibration transmission.

7. External Noise Isolation & Mechanical Decoupling

Controlling environmental noise and mechanical vibrations is essential in high-performance venues:

  • Mass-loaded barrier systems incorporated into walls and ceilings to mitigate airborne sound transmission.

  • Precision-sealed acoustical doors and triple-glazed windows to ensure high STC (Sound Transmission Class) ratings.

  • Vibration isolation mounts for speaker arrays, lighting rigs, and stage equipment to prevent mechanical coupling and structural resonance.

8. Custom Acoustic Engineering & Computational Modeling

Every venue presents unique acoustic challenges that require a tailored approach. Advanced engineering methodologies include:

  • Predictive acoustic modeling and ray tracing simulations to assess reflection patterns, reverberation times, and sound decay characteristics.

  • On-site FFT (Fast Fourier Transform) analysis and real-time RTA (Real-Time Analyzer) measurements to fine-tune system performance.

  • Adaptive DSP (Digital Signal Processing) integration for real-time EQ adjustments based on occupancy and environmental conditions.

Partner with Infinity Sound for Industry-Leading Acoustic Solutions

At Infinity Sound, our in-house engineering team specializes in precision A/V and acoustic system design. From initial concept to final commissioning, we provide end-to-end solutions that optimize intelligibility, spatial consistency, and immersive sound reproduction. Leveraging cutting-edge modeling, premium-grade materials, and expertly calibrated systems, we ensure that your venue delivers world-class audio performance.

Connect with us to discuss a custom-engineered acoustic solution tailored to your venue’s unique needs.

Infinity Partners with QSC and UTD

Infinity Brings QSC to UT Dallas

Infinity is proud to have installed the new QSC PL speaker series at the Edith O’Donnell Arts and Technology Lecture at UT Dallas. This brand new, cutting-edge audio system delivers clear audio quality and unmatched flexibility for performances. Infinity used the QSC DCIO cinema processor and CX-Q amplifiers to create an immersive listening experience with their existing surround speaker system. This cutting-edge A/V system delivers seamless audio control, intuitive operation, and unmatched flexibility for performances. We’re especially excited about how the line array speakers turned out, providing crystal-clear sound coverage and exceptional balance throughout the space. These high-performance speakers ensure that every performance, lecture, and event is experienced with pristine audio quality. Watch our latest video to see how we’re transforming this space and setting a new standard for immersive sound!

FEATURES:

  • Lecture Hall

    • Include Main Arrays manufactured by QSC

    • Installed a Cinema Processor manufactured by QSC

    • Main Subs and Amps manufactured by QSC

    • 680-seat performance hall

PARTNERS:

  • Owner: University of Texas at Dallas

  • AV Design-Build Contractor: Infinity Sound

Ensuring Longevity: Best Practices for Maintaining Your A/V Equipment

Ensuring Longevity: Best Practices for Maintaining Your A/V Equipment

Taking care of your audio-visual (A/V) equipment isn’t just about making it last longer—it’s about ensuring you always get the best performance when you need it most. Whether you're running presentations, setting up for an event, or just enjoying a high-quality sound and video experience, a little maintenance goes a long way. Here are some simple but essential tips to keep your gear in top shape.

1. Keep It Clean

Dust and debris can mess with your equipment’s performance and even cause overheating. Use a soft, lint-free cloth to gently clean screens, lenses, and surfaces. For internal components, follow the manufacturer’s recommendations or bring in a pro for a deep clean. A can of compressed air can help clear out dust from vents and tight spaces. And remember—always power down and unplug before cleaning!

2. Check Your Gear Regularly

It’s easy to set up your equipment and forget about it—until something goes wrong. Make it a habit to do quick inspections, whether it’s daily, weekly, or monthly, to spot any loose connections, frayed cables, or signs of wear. Keeping an eye on things can prevent small issues from turning into big headaches.

3. Stay Updated

Firmware and software updates might not be the most exciting part of A/V maintenance, but they’re crucial. Updates often fix bugs, improve performance, and add new features. Check for updates regularly and turn on automatic updates when possible.

4. Give It Some Breathing Room

Overheating can shorten your equipment’s lifespan. Make sure your gear is stored in a cool, dry place and has proper ventilation when in use. Avoid stacking devices in a way that blocks airflow, and if you’re running multiple pieces of equipment, consider adding cooling fans.

5. Test and Fine-Tune

If you want the best sound and picture quality, regular calibration is key. Adjust your audio and video settings to get the clearest, most accurate performance. Test microphones, speakers, and displays periodically to catch any issues before they affect an important meeting or event.

6. Manage Cables Like a Pro

Tangled, damaged, or misplaced cables can cause unnecessary problems. Keep cables organized using Velcro ties or cable organizers, and avoid bending or twisting them too much. Neatly managed cables not only look better but also make troubleshooting easier when needed.

7. Protect Your Power Source

Surge protectors and uninterruptible power supplies (UPS) aren’t just accessories—they’re necessities. Power surges or outages can damage sensitive equipment, so it’s worth investing in protection to avoid costly repairs or replacements.

8. Plan for Preventive Maintenance

Don’t wait until something breaks—schedule routine maintenance to keep everything running smoothly. Cleaning, inspections, and updates should be part of your regular routine. Keeping a maintenance log can help you track what’s been done and when.

9. When in Doubt, Call the Experts

Even with the best care, sometimes equipment needs professional attention. If you notice something off or just want to make sure everything is working at its best, we’re here to help.

Need Assistance? Contact Infinity Sound’s Service Team!

Our expert team is ready to assist you with troubleshooting, repairs, and routine maintenance. If you ever need a hand, just reach out! Support — Infinity

By adhering to these best practices, you can ensure your A/V equipment remains reliable and delivers high-quality performance over time.

Wireless Signal Optimization: Best Practices for Setting Up Wireless Microphones and Devices to Avoid Interference

Wireless Signal Optimization: Best Practices for Setting Up Wireless Microphones and Devices to Avoid Interference

In the world of live events, corporate meetings, and large venues, clear and reliable wireless audio is essential. However, interference and signal dropouts can quickly turn a seamless performance into a frustrating experience. Properly setting up wireless microphones and devices is crucial to ensuring optimal signal quality. Here are some best practices to help you avoid interference and maximize performance.

1. Choose the Right Frequency Bands

Wireless microphones operate on different frequency bands, including UHF, VHF, and 2.4 GHz. To avoid interference:

  • Research local frequency regulations and avoid congested bands.

  • Use frequency coordination tools to find the best open frequencies.

  • Consider professional-grade systems that allow multiple frequency options.

2. Perform a Frequency Scan

Before setting up your wireless system, always perform a frequency scan:

  • Most modern wireless systems have built-in scanning functions to detect and select the clearest available frequencies.

  • Avoid using default factory frequencies, as they may overlap with other devices.

3. Maintain Line of Sight

Physical obstructions can weaken wireless signals. To ensure optimal transmission:

  • Place receivers in direct line of sight with transmitters.

  • Avoid positioning receivers near metal objects, walls, or other electronic equipment that can cause interference.

  • Elevate antennas to reduce obstructions.

4. Optimize Antenna Placement

Proper antenna placement is key to reducing dropouts and improving signal strength:

  • Use diversity antennas to minimize signal loss.

  • Position antennas at least one wavelength apart (around 12 inches for UHF systems).

  • Avoid placing antennas too close to each other or near large conductive surfaces.

5. Minimize RF Interference

Many electronic devices emit radio frequencies that can interfere with your wireless microphones:

  • Keep wireless devices away from Wi-Fi routers, LED walls, and other RF-heavy equipment.

  • Turn off unnecessary wireless transmitters in the vicinity.

  • Use shielded cables to reduce interference from power sources.

6. Monitor and Adjust in Real-Time

Once your system is set up, continuously monitor the wireless environment:

  • Use RF spectrum analyzers to detect interference sources.

  • Have backup frequencies ready in case of unexpected interference.

  • Test all connections and conduct a full soundcheck before the event.

7. Consider Digital Wireless Systems

Digital wireless microphones offer several advantages over analog systems:

  • They provide better resistance to interference and noise.

  • Digital encryption improves security for sensitive applications.

  • Some systems allow multiple devices to operate in the same frequency range without crosstalk.

Conclusion

Optimizing wireless signals for microphones and devices requires careful planning, frequency management, and real-time monitoring. By following these best practices, you can minimize interference, ensure clear audio transmission, and create a seamless experience for your audience. Whether you're setting up for a live concert, corporate event, or theatrical production, a properly optimized wireless system will help you deliver flawless sound every time.

Understanding Microphones: Selecting the Right Microphone for Your Needs

Understanding Microphones: Selecting the Right Microphone for Your Needs

Understanding Microphones: Selecting the Right Microphone for Your Needs

Capturing high-quality audio requires choosing the right microphone for the specific application and environment. This guide explores various microphone types, their ideal uses, and essential factors to consider, ensuring you make an informed decision that enhances your recordings.

Understanding Microphone Types

Microphones convert sound waves into electrical signals, and their design influences their performance in different settings. The primary types include:

Dynamic Microphones

How They Work: Dynamic microphones operate on electromagnetic induction, using a diaphragm attached to a coil within a magnetic field.

Best Applications:

  • Live performances – Their durability and feedback resistance make them perfect for vocals on stage.

  • High sound pressure environments – Excellent for miking loud sources like guitar amplifiers, drums, and brass instruments.

  • Outdoor use – With their rugged design, dynamic microphones withstand environmental conditions better than other types.

Example: Shure SM58, Sennheiser e935

Condenser Microphones

How They Work: These microphones use electrostatic principles, featuring a diaphragm positioned near a backplate, forming a capacitor. They require external power, typically supplied as phantom power (48V).

Best Applications:

  • Studio recordings – Their sensitivity and accuracy capture detailed vocal and instrumental nuances.

  • Acoustic instruments – Ideal for recording guitars, violins, and pianos due to their extended frequency response.

  • Broadcasting & voice-over work – Common in radio stations and professional voice recording.

Example: Neumann U87, Audio-Technica AT4040

Ribbon Microphones

How They Work: Ribbon microphones use a thin metal ribbon suspended in a magnetic field to pick up sound, creating a natural and smooth frequency response.

Best Applications:

  • Orchestral and classical music recording – They reproduce warm, rich tones for strings and horns.

  • Vintage-style vocals – Ribbon mics offer a classic, smooth sound favored by jazz and blues artists.

  • Controlled studio environments – Due to their delicate nature, they perform best in spaces free from strong air currents and mechanical shocks.

Example: Royer R-121, AEA R84

USB Microphones

How They Work: These microphones integrate built-in analog-to-digital converters, allowing direct connection to a computer via USB.

Best Applications:

  • Podcasting and streaming – Easy to set up with plug-and-play functionality.

  • Home recording and online meetings – Ideal for users without an external audio interface.

  • Beginner musicians and content creators – Affordable, versatile, and convenient for entry-level users.

Example: Blue Yeti, Rode NT-USB

Lavalier Microphones

How They Work: Also known as lapel mics, these small clip-on microphones are designed for hands-free operation.

Best Applications:

  • Interviews and presentations – Discreet and convenient for public speaking.

  • Theatrical performances – Allows actors to move freely without holding a microphone.

  • Broadcasting and news reporting – Common in TV journalism for capturing clear speech.

Example: Sennheiser ME 2-II, Rode SmartLav+

Shotgun Microphones

How They Work: These highly directional microphones feature a narrow pickup pattern, isolating sounds from the front while minimizing ambient noise.

Best Applications:

  • Film and video production – Used for capturing dialogue in controlled environments.

  • Broadcasting and ENG (Electronic News Gathering) – Excellent for capturing voice in noisy surroundings.

  • Field recording – Ideal for capturing wildlife and ambient sound effects.

Example: Rode NTG4+, Sennheiser MKH 416

Choosing the Right Microphone for Your Application

Selecting a microphone depends on the intended use and the recording environment:

  • Live Vocals: Dynamic microphones like the Shure SM58 ensure durability and feedback rejection. These are commonly used for live performances such as concerts, speeches, and stage presentations, where clear audio projection is essential.

  • Studio Vocals: Large-diaphragm condenser microphones such as the Neumann U87 provide clarity and detail.

  • Acoustic Instruments: Small-diaphragm condensers like the AKG C451B excel at capturing fine details.

  • Electric Guitar Amplifiers: The Sennheiser e609 dynamic mic handles high SPL without distortion.

  • Drum Kits: A combination of dynamic and condenser microphones captures the full tonal range of a drum set.

  • Podcasting & Streaming: USB microphones like the Blue Yeti offer a simple, high-quality solution.

  • Interviews & Presentations: Lavalier microphones ensure discreet, hands-free operation.

  • Film & Video Production: Shotgun microphones like the Rode NTG4+ isolate sound from specific sources.

Additional Considerations

When selecting a microphone, consider the following factors:

Polar Patterns

The directional sensitivity of a microphone affects how it picks up sound:

  • Cardioid: Captures sound from the front while rejecting noise from the sides and back. Ideal for vocals and live performances.

  • Supercardioid/Hypercardioid: Offer tighter pickup patterns, reducing ambient noise even further. Suitable for noisy environments or broadcasting.

  • Omnidirectional: Captures sound equally from all directions, making it ideal for ambient recording and group discussions.

  • Bidirectional (Figure-Eight): Captures sound from the front and back while rejecting the sides, commonly used for duet recordings and stereo techniques.

Frequency Response

A microphone's frequency response affects how it reproduces different sound frequencies. For example:

  • Boosted high frequencies enhance vocal clarity.

  • Extended low-end response is great for capturing deep, rich tones in bass instruments.

Sensitivity & SPL Handling

Microphones with higher sensitivity capture more detail but may also pick up unwanted noise. High SPL handling is crucial for loud sources like drums and amplifiers.

Connectivity Options

  • XLR microphones require an audio interface or mixer but offer superior audio quality and flexibility.

  • USB microphones are plug-and-play, making them convenient for home setups and beginners.

Budget

While premium microphones offer superior performance, there are many cost-effective options that deliver excellent results for specific applications.

Conclusion

Selecting the right microphone requires understanding its characteristics, the recording environment, and the intended application. By considering factors such as microphone type, polar pattern, and connectivity, you can choose the perfect mic to enhance your audio recordings and meet your project’s needs.

How to Keep Your Professional A/V Gear Safe in Cold Weather

How to Keep Your Professional A/V Gear Safe in Cold Weather

Cold weather presents unique challenges for outdoor stadiums, and other venues that rely on professional audio and video (A/V) equipment. Extreme temperatures can wreak havoc on sensitive electronics, batteries, and cables, potentially leading to costly repairs, downtime, or equipment failure. For venue managers, ensuring the reliability of A/V gear during colder months is crucial to providing seamless events and protecting your investment. Here’s how to safeguard your gear and keep operations running smoothly when the temperature drops.

1. Understand How Cold Weather Impacts Your Gear

Extreme cold can affect your equipment in several ways:

  • Condensation: Shifting between cold outdoor environments and warm storage areas can create moisture that damages internal components.

  • Battery Performance: Wireless microphones, cameras, and other battery-powered devices lose charge faster in the cold, reducing runtime.

  • Cable Durability: Rubber and plastic cables may become brittle and crack when exposed to low temperatures or frequent handling.

  • Display Functionality: LCD screens can freeze or become sluggish, making them harder to operate.

2. Prepare Before the Cold Hits

Taking preventive steps before events can save you from unexpected issues:

  • Use Protective Cases: Invest in insulated, weather-resistant cases to shield your gear from temperature extremes and moisture.

  • Pack Desiccants: Include silica gel packs in storage cases to absorb moisture and reduce condensation risks.

  • Fully Charge Batteries: Start with fully charged batteries and bring spares, keeping them warm until needed.

  • Inspect Your Equipment: Before the season begins, check for vulnerabilities like frayed cables, outdated batteries, or damaged connectors.

3. Protect Your Gear During Events

While your venue is hosting events in cold weather, follow these best practices:

  • Use Thermal Covers: Equip cameras, microphones, and other devices with thermal wraps to maintain consistent operating temperatures.

  • Elevate Equipment: Keep gear off wet or icy ground using tripods, stands, or protective mats.

  • Monitor Power Levels: Rotate cold batteries with warm spares to avoid interruptions.

  • Shield Cables and Connectors: Use durable cable covers to prevent cracking and protect connections from snow, ice, or water exposure.

4. Handle Temperature Transitions Carefully

Sudden temperature changes can lead to condensation and damage:

  • Allow Equipment to Warm Gradually: Leave gear in its case when moving indoors so it can acclimate slowly.

  • Wipe Down Gear: Remove any visible moisture before storing your equipment.

5. Optimize Off-Season Storage

Proper storage during the colder months can extend the life of your equipment:

  • Choose Climate-Controlled Storage: Keep A/V gear in a temperature-regulated, dry environment to prevent damage from cold or humidity.

  • Use Dehumidifiers: If your storage area is prone to dampness, a dehumidifier can protect your electronics.

  • Inspect Periodically: Regularly check for signs of wear, damage, or corrosion and address any issues promptly.

6. Invest in Weather-Resistant Gear

If your venue regularly hosts events in challenging climates, consider upgrading to A/V equipment designed for cold weather. Many manufacturers offer rugged, weather-resistant options built to withstand extreme conditions, ensuring dependable performance no matter the temperature.

Final Thoughts

Protecting your A/V gear from cold weather is more than just good practice—it’s an investment in the success of your events and the longevity of your equipment. With proper preparation, smart on-site practices, and attention to storage, you can avoid unnecessary downtime and deliver exceptional experiences for your audience year-round. By taking these steps, your venue will be ready to tackle the challenges of winter while maintaining the highest quality standards.

Cable Management Best Practices: Organizing, Labeling, and Securing for Success

If you’ve ever wrestled with a mess of tangled cables, you know how frustrating and time-consuming it can be to make sense of it all. But in the Audio, Visual, and Lighting (AVL) industry, messy cables are more than just an eyesore—they can lead to equipment failures, safety hazards, and wasted time troubleshooting.

Good cable management is one of the easiest ways to keep your setup running smoothly, whether you’re managing a live event, setting up a home theater, or working on a permanent install. Here’s how to keep things organized, safe, and stress-free.

1. Plan Before You Plug

Jumping straight into plugging things in might seem like the fastest way to get started, but it can lead to chaos down the road. Take a moment to map out your setup. Where are your devices going? How long do the cables need to be? Are they crossing high-traffic areas?

Starting with a plan saves time later when you’re troubleshooting or adjusting your setup. A quick sketch or simple diagram can help you visualize your cable layout before you start.

2. Use the Right Tools for the Job

Investing in a few simple tools can make cable management a breeze. Here are some must-haves:

  • Velcro straps: Perfect for bundling cables without damaging them. Plus, they’re reusable.

  • Cable trays or raceways: Great for hiding and protecting cables in permanent installs.

  • Gaffer’s tape: A staple for live events to secure cables to floors without leaving sticky residue.

The right tools don’t just make your setup look clean—they make it easier to maintain and adjust over time.

3. Label Everything

Picture this: You’re troubleshooting a signal issue and staring at a sea of identical cables. Which one’s the problem? Without labels, figuring it out can feel impossible.

Label both ends of every cable with clear, easy-to-read identifiers. You can use printed labels, heat-shrink tubing, or even masking tape and a marker in a pinch. For larger setups, consider color-coding your labels—red for audio, blue for video, yellow for power, and so on.

This simple step saves you tons of time when something goes wrong or when you need to reconfigure your system.

4. Keep Power and Signal Cables Separate

Mixing power and signal cables might seem harmless, but it can cause real problems. Power cables emit electromagnetic interference (EMI), which can lead to hums in your audio or distortion in your video.

To avoid this, run power cables and signal cables along separate paths. If they need to cross, make sure they do so at a 90-degree angle to minimize interference.

5. Bundle Smartly, Not Tightly

Bundling cables together keeps things tidy, but be careful not to overdo it. Overly tight wraps can damage the insulation or the internal wiring. Use Velcro straps or cable sleeves to group related cables (like audio inputs or video connections) without putting too much strain on them.

For temporary setups, spiral cable wraps can help keep everything together while allowing for quick adjustments.

6. Secure Cables Properly

Loose cables are more than just a tripping hazard—they can also cause equipment damage or downtime. For temporary setups, use gaffer’s tape to secure cables running along floors. For permanent installations, use cable clips, clamps, or mounts to keep everything in place.

But don’t hide cables so well that they’re impossible to access! A clean setup should still allow for easy maintenance when needed.

7. Inspect and Maintain Regularly

Cable management isn’t a “set it and forget it” kind of job. Over time, cables can shift, labels can fade, and connections can loosen. Make it a habit to check your setup regularly, especially after heavy use or equipment changes.

A quick inspection can catch issues early and prevent bigger problems down the line.

8. Quality Matters

The best cable management in the world won’t save you if your cables are junk. Cheap, poorly made cables are more likely to fail, degrade signal quality, or even cause safety hazards. Invest in high-quality, shielded cables that are built to last—your equipment (and your sanity) will thank you.

Why It All Matters

At the end of the day, proper cable management is about more than just aesthetics. It’s about creating a setup that’s safe, efficient, and easy to maintain. Whether you’re running a live show, installing a permanent system, or just trying to organize your workspace, taking the time to do it right pays off in performance, reliability, and peace of mind.

So, grab some Velcro straps, break out the labels, and show those cables who’s boss. You’ll thank yourself later.

Basic Troubleshooting Tips for Audio-Video Latency

Latency in audio-video systems refers to the delay between the video signal and the corresponding audio, leading to noticeable synchronization issues (e.g., seeing lips move before hearing sound). Below are key troubleshooting steps to address audio-video latency:

  1. Check Cables and Connections

    • Faulty cables or poor connections can cause sync issues.

    • Ensure all cables (HDMI, audio, video) are securely connected and try swapping out cables if necessary.

    • For wireless connections, move devices closer together or switch to a wired connection to reduce delay.

  2. Adjust Audio Delay Settings

    • Many devices offer built-in settings to correct small sync issues, such as "lip sync" or "audio delay" adjustments.

    • Access these settings on your TV, sound system, or receiver and adjust the delay until the audio and video sync correctly.

  3. Check the Source Device

    • Streaming devices or media players (e.g., Blu-ray players, Apple TV, gaming consoles) can sometimes introduce lag.

    • Restart the device and ensure its firmware or software is up to date.

    • For streaming services, temporarily reduce video quality to test if bandwidth is affecting synchronization.

  4. Reduce Processing Lag

    • Advanced video processing features like motion smoothing can add delay.

    • Disable enhancements such as motion smoothing, noise reduction, or "auto-motion" settings.

    • Enable "game mode" to reduce processing time and improve sync.

  5. Sync External Audio Systems

    • External sound systems, like soundbars or AV receivers, may introduce audio delays.

    • Adjust the audio delay setting on your sound system to align audio with video.

    • Ensure proper configuration of pass-through options like HDMI ARC/eARC to reduce unnecessary audio processing.

  6. Check Network Connection (For Streaming)

    • A weak or slow internet connection can cause video buffering and audio-video desynchronization.

    • Test internet speed (aim for at least 25 Mbps for HD/4K content) and connect your device to the router via Ethernet instead of Wi-Fi for better stability.

  7. Update or Reset Devices

    • Latency can be caused by outdated software or firmware.

    • Ensure all devices (TV, streaming boxes, audio systems) have the latest updates, and reset devices to factory settings if problems persist.

  8. Minimize Bluetooth Audio Delays

    • Bluetooth devices can introduce lag due to transmission time.

    • Avoid Bluetooth audio for setups requiring precise sync. If necessary, use Bluetooth devices with aptX Low Latency support to reduce delay.

  9. Use a Sync Box or External Delay Processor

    • For complex setups with multiple devices (e.g., TV, AV receiver, soundbar), a sync box can help manage delays.

    • A video/audio delay processor can be inserted between the video source and display to fine-tune the audio-video sync.

Practical Example: School or Event Center Theater Setup

For setups involving sound systems connected to projection systems, follow these steps:

  1. Adjust Audio Settings on the Mixer

    • Access the audio settings on your sound mixer and adjust the latency or delay settings to sync audio and video.

  2. Inspect Sound System Configuration

    • Review the settings on the audio processing unit or amplifier and adjust any audio sync features.

  3. Evaluate Video Processing Settings

    • Check the video projector or display settings, disabling motion smoothing or frame interpolation to avoid introducing latency.

By following these troubleshooting tips, you can minimize or eliminate audio-video latency, ensuring that sound and visuals remain perfectly synchronized for an enhanced viewing experience.

Deciding Between 4k and HD for Corporate Displays

Deciding Between 4k and HD for Corporate Displays

Key Considerations: Deciding Between 4K and HD for Corporate Displays

When it comes to outfitting your office with displays, choosing the right resolution is crucial for both functionality and budget. Two common options are 4K and HD (1080p), each with its own set of advantages. Here’s a breakdown of the key factors to help you make an informed decision:

  1. Image Quality

    • 4K offers four times the resolution of HD, resulting in crisper, more detailed images. If your presentations, videos, or graphics require high precision (such as design work or large data sets), 4K is a clear winner.

    • HD (1080p) provides excellent image quality for most business applications. While not as sharp as 4K, HD is more than sufficient for general meetings, presentations, and video conferencing.

  2. Content Availability

    • 4K content is becoming more accessible, especially for media-rich presentations or corporate video content. However, not all content is created in 4K, so it’s important to evaluate whether your team will consistently use 4K-quality media.

    • HD content is far more ubiquitous and widely supported, making it a practical choice if you primarily rely on standard video calls, slideshows, and general content.

  3. Viewing Distance and Screen Size

    • For larger screens (55 inches or more), 4K makes a noticeable difference, especially when viewed from a distance. The additional pixels ensure that the image remains sharp even on bigger displays.

    • For smaller displays or if the viewing distance is relatively short, HD will still provide clear, crisp images without the need to invest in the higher cost of 4K.

  4. Budget Considerations

    • 4K displays tend to be more expensive, both in terms of initial cost and the potential need for compatible hardware and content. Consider your budget and how often you’ll be utilizing the enhanced resolution.

    • HD displays are more affordable and often provide sufficient quality for everyday office tasks, such as meetings, presentations, and digital signage.

  5. Future-Proofing

    • Investing in 4K could be a smart move if you're looking to future-proof your office, especially as 4K content and devices become more mainstream. It’s an option that can grow with your company’s evolving needs.

    • However, if your current needs are focused on standard office tasks and you don’t foresee heavy use of 4K media, HD can still serve you well for the foreseeable future.

Ultimately, the choice between 4K and HD comes down to the nature of your business needs, content requirements, and budget. If you need the sharpest possible image quality for high-end presentations or digital signage, 4K is the way to go. However, for general office use and meetings, HD provides excellent value with solid performance at a lower cost.

Are you considering upgrading your corporate displays? Let us know how we can help with your decision!

Explanation of Resolution and Refresh Rates

Explanation of Resolution and Refresh Rates

Stay ahead in the world of audio and visual technology by subscribing to the Infinity Sound newsletter! Packed with valuable tech tips, industry insights, and expert advice, our newsletter brings the latest in A/V directly to your inbox. Whether you’re looking to enhance your skills, stay updated on new trends, or get inspiration for your own projects, we’ve got you covered. Don’t miss out – subscribe today and keep your tech knowledge sharp!

Resolution and Refresh rates

In the world of video, resolution and refresh rates are key concepts that affect the quality and smoothness of what you see on screens. Here’s a simple breakdown of what they mean and how they impact the viewing experience.

Resolution:

  • Resolution refers to the number of pixels (tiny dots of color) that make up the image on a screen. The more pixels, the sharper and more detailed the image looks.

Common resolutions include:

    • 720p (HD): 1280 x 720 pixels. It’s high definition, but relatively low by today’s standards.

    • 1080p (Full HD): 1920 x 1080 pixels. A common resolution for TVs, monitors, and projectors, offering clear and sharp images.

    • 4K (Ultra HD): 3840 x 2160 pixels. Four times the resolution of 1080p, providing much more detail and clarity, especially on larger screens.

    • 8K: 7680 x 4320 pixels. Extremely high resolution, mostly used in professional settings or high-end displays. It’s very sharp but requires a lot of processing power and storage.

Why it matters: Higher resolution means sharper images, especially on larger screens or when you’re viewing up close. For instance, a 4K screen will look much clearer than a 1080p screen, especially for things like movies, sports, or digital signage where fine details matter.

Refresh Rate:

  • Refresh rate is how many times per second the image on the screen is updated, measured in Hertz (Hz). This impacts how smooth motion appears on the screen.

Common refresh rates include:

    • 60Hz: The screen refreshes 60 times per second. This is standard for most TVs and monitors and provides smooth motion for everyday use, such as watching TV or playing console games.

    • 120Hz: The screen refreshes 120 times per second. This higher refresh rate provides smoother motion, especially noticeable in fast-action scenes like sports or video games.

    • 240Hz: Even faster, often found in high-end gaming monitors or professional displays. It’s mostly used for extremely fast-moving content, but for regular use, the difference between 120Hz and 240Hz can be hard to notice.

Why it matters: A higher refresh rate means smoother motion, especially in fast-moving scenes. If you’re watching a fast-paced action movie, playing a video game, or showing fast-moving graphics on a digital display, a higher refresh rate (120Hz or above) will make the experience feel more fluid and less blurry.


Resolution and Refresh Rate Together:

  • Resolution determines the clarity of the image, while refresh rate controls how smooth the motion is.

For example:

    • A 1080p video at 60Hz will look good and smooth for most uses.

    • A 4K video at 120Hz will look incredibly sharp and smooth, making it ideal for high-end presentations, gaming, or live events where both detail and motion are important.


Practical Example – Choosing the Right Setup:

  • Home Theater: If you’re setting up a home theater, a 4K screen with a 60Hz refresh rate is usually great for movies and TV shows. It gives you excellent detail and smooth motion.

  • Gaming: For gaming, you might prefer a 1440p or 4K screen with at least a 120Hz refresh rate. This gives you both sharpness and smooth motion, which is crucial for fast-paced games.

  • Digital Signage or Live Events: In live event settings (like concerts or sports), where the screen may be large and the motion is fast, a 4K screen with a higher refresh rate (120Hz or above) ensures both clarity and smoothness.

For example:

  • A higher resolution screen being more suitable for a training space displaying critical information with smaller sized content like spreadsheets

  • A lower resolution screen being more suitable for a performance space with less critical information like a scenic backdrop

In short, resolution affects how clear and detailed the image is, while refresh rate affects how smooth the motion looks. Both work together to create a high-quality visual experience that can be tailored to different types of content, from movies and games to professional displays and live events.


Projector vs LED Display Considerations

Projector vs LED Display Considerations

When choosing between a projector and a direct view LED display, several key factors come into play, including image quality, ambient light conditions, installation flexibility, maintenance requirements, cost considerations, and the specific needs of the space and content being displayed.

Image Quality vs. Brightness

LED displays outperform projectors in terms of image quality and brightness, offering superior contrast ratios, more vibrant colors, and "true blacks". With brightness levels typically exceeding 1000 nits, LED displays can maintain image clarity even in well-lit environments, while projectors often struggle in ambient light conditions. Moreover, LED displays maintain consistent image quality regardless of size, whereas projector image quality tends to degrade as the projection area increases.

Installation and Flexibility

LED displays offer superior flexibility in installation and configuration compared to projectors. Their modular design allows for customization into various shapes and sizes, making them adaptable to different spaces and creative layouts. In contrast, projectors require unobstructed space between the device and the screen, limiting placement options and potentially causing shadows when obstructed. LED walls are also typically easier to install, can be mounted directly on walls, and are more portable, allowing for simpler dismantling and relocation to new spaces. This versatility makes LED displays particularly suitable for permanent installations or frequently changing environments.

Maintenance and Cost Considerations

LED displays offer significant advantages in terms of maintenance and longevity, with lifespans reaching up to 100,000 operational hours compared to projectors' typical 20,000 hours. This extended lifespan translates to lower long-term maintenance costs for LED displays, despite their higher initial investment. Projectors, while often less expensive upfront, require more frequent maintenance, including regular bulb replacements, which can increase overall expenses over time. When considering cost-effectiveness, it's crucial to factor in both the initial purchase price and the long-term operational costs associated with each technology.

Tech Tips: Explaining Monitors

Tech Tips: Explaining Monitors


Stay ahead in the world of audio and visual technology by subscribing to the Infinity Sound newsletter! Packed with valuable tech tips, industry insights, and expert advice, our newsletter brings the latest in A/V directly to your inbox. Whether you’re looking to enhance your skills, stay updated on new trends, or get inspiration for your own projects, we’ve got you covered. Don’t miss out – subscribe today and keep your tech knowledge sharp!

In audio, monitors are speakers or in-ear systems that allow performers and crew to hear what’s going on during a live event. Monitors help them stay in sync with the music, dialogue, or action. Let’s break it down further, including placement on stage and how volume control works.

What Are Monitors?

  • Monitors are speakers used on stage so that musicians, actors, or crew members can hear themselves and others during a live performance

  • Unlike the main speakers that face the audience, monitors are positioned facing the stage and provide sound to performers

  • Monitors typically receive their own mix catered to the stage member or specific use

Types of Monitors:

  1. Floor Monitors: These are speakers placed on the floor, angled towards the performer

  2. In-Ear Monitors: These are small earpieces worn by the performer and can be wired or wireless depending on the system

  3. Overhead Monitors: These are speakers mounted on an overhead stage batten

  4. Powered Monitors: Powered monitors have a built-in amplifier and receive an individual mix from a mixing console. These are a great option for flexibility because each speaker receives a unique mix

  5. Passive Monitors: Passive monitors require an external amplifier. Each channel will receive an individual mix from the mixing console. The monitors will connect to designated connections on stage (typically labeled A,B,C,D, etc.). This is a great option for simplicity because less mixes are used from the mixing console.

Monitor Placement on Stage

  • Proper monitor placement is critical for performers to hear themselves clearly without sound issues like feedback or overpowering volume.

  • Floor Monitors are typically placed:

    • In front of the performer (but angled up toward them), ensuring they can hear themselves and other essential sounds (like other band members or a click track for timing).

    • Not too close to the performer’s mic to avoid feedback (that annoying high-pitched squeal that happens when the sound from the monitor gets picked up by the mic and loops).

    • At the sides of the stage to provide discreet monitors during performances where floor monitors can’t be seen from stage and do not have the infrastructure for overhead monitors

  • In-Ear Monitors: don’t require physical placement on stage but are key for reducing on-stage noise, giving performers a clearer and more controlled sound experience

  • Overhead: This is popular for shows that need discreet monitors such as a dance recital


Setting Volume

  • Getting the volume right is crucial for effective monitoring:

    • Too low: The performer can’t hear themselves, which can lead to mistakes in timing, pitch, or performance quality

    • Too high: It can cause hearing damage, create sound bleed into the audience, or lead to feedback 

  • Monitor levels can be adjusted from each individual mix at the mixing console. Many mixing console manufacturers offer an application to control individual mixes from a phone or tablet. This allows for easier monitor changes from stage members

  • Each performer will have different requirements on what they need in a monitor mix to feel comfortable. As the audio engineer, it is important to make sure their requests are met while ensuring proper volume levels to minimize feedback and other issues


Practical Example – A Band Setup:

  • The lead vocalist might have a wedge monitor in front of them, angled up so they can hear their own voice and instruments of their choosing to stay on time

  • The drummer might have in-ear monitors or a large side-fill speaker, with a custom mix that gives them plenty of the bass guitar and a click track for keeping time

  • The guitarist might have a wedge near their feet with their instrument, the bass guitar and vocals

Monitors are a crucial tool for performers to hear themselves and each other during a live performance, and proper placement and volume control ensure a smooth, feedback-free show that protects the performers’ hearing while keeping them on cue.

 Join our newsletter to receive our tech tips in your inbox.